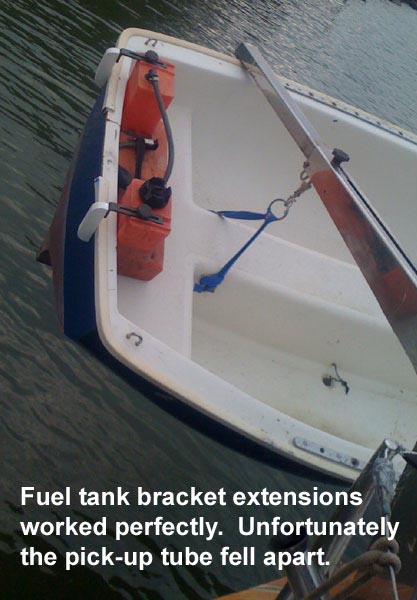
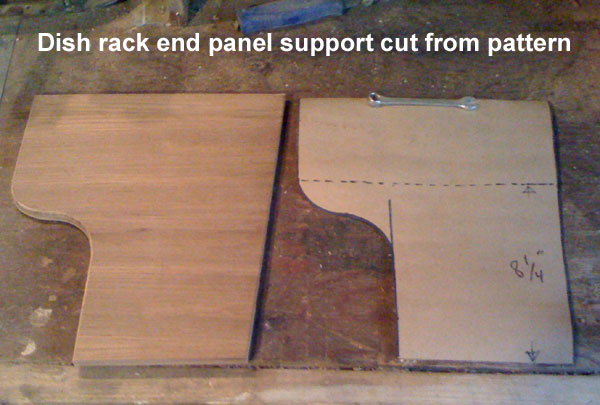
It's been a busy week, filled with chores, projects, problems and a bit of fun. At the house, I was busy keeping it in showing condition while I did some projects in the shop. As a consequence of spending a few days on the boat last week, I decided to do a few things to make it more livable. I had a decent mahogany dish rack that I had removed from my last boat because it had been built in so close to the underdeck that it was unusable. By building it into Circadian's galley I would free up a couple of drawers and make access to dishware handier. So, I refinished it and built new supports to fit it into Circadian. I also made extensions for the outboard fuel tank's hold down brackets. They were too short to use on the dinghy, and the P.O.'s solution was an ugly spiderweb of lines.
My friend Nick had invited me to go fishing with him on Friday, so we met up at oh-dark-thirty and headed for Lake Berryessa to fish for kokanee salmon. Nick is an avid and extremely knowledgeable angler, while I hardly know which end of the pole to hold. Needless to say I learned a lot, had a lot of fun, and even caught several fish. Because the kokanee salmon's favorite food is plankton, rather than trying to tempt it with food, you are trying to irritate it into attacking the lure. There's a lot to it, more than I can detail here. Besides, I promised Nick I wouldn't reveal all the secrets.


Saturday, it was back out to Circadian to see how well I'd done with my shop work, continue working on the autopilot, perhaps get the outboard going, and tackle some other projects on "the list." Checking the fuel tank brackets was fast, easy and successful. However, in the process, I discovered that the fuel pickup tube in the tank was gone. There would be no outboard testing this week, just another task (replace the pickup tube) added to the list.

Mounting and testing the heater chimney cap guard was also fast and easy, but only partially successful. It does of course get hot on the top, but not as hot as the chimney cap. Perhaps more importantly, it's not the type of shape one is likely to grab for, especially with the new grab handle in place. However, I discovered when maneuvering Circadian that it interferes with the throttle control lever and I'll need to turn it 90 degrees to provide the needed clearance. Only four wood screws, so it's no big deal.

I installed a new ventilation fan to push cool air past the refrigerator's compressor and cooling tubing and then out the new ventilation hole in the top cover. It was easy to wire it into the compressor fan's circuit so it comes on only when the compressor is running. I also filled the gap between the top of the refrigerator and the top cover with expanding insulating foam. After a couple of days of use in the heat, I was delighted with the improvement. I would guess at least 25% less run time at a cost of only .38 amps (including the very cool blue LEDs!. What can I say: the fan with the LEDs was $10 cheaper than an equivalent one without.) In the process of diving down into the innards of the frig box, I noticed that there remains significant space between the outside of the refrigerator and the inside wall of the box. I think I can gain even more efficiency by filling that gap with foam. By using my proven, but not patented, "foam in the trash bag" method, I think I can do it with little mess. It should even allow the refrigerator to be removed without surgery if necessary.




My next task was wiring up the steaming light. That required installing a switch for it into the running lights circuit. I was able to find a spot for the switch in the old cockpit breaker panel, and drilling a hole in the aluminum panel was no problem. The wiring was simplified by placing the switch there, and it was also the logical place for it. Doesn't look too bad either (although the panel itself obviously needs work). Because the switch illuminates when in the "on" position, it's a reminder that the steaming light is on. The wiring was relatively easy and painless, and the light worked just fine. Inspired by my success, I finally properly secured all the loose wiring that had been dangling down from the ceiling in the main cabin since I bought Circadian. To cap off the day, I got to check off an item from "the list."


At this point I was happy, but pooped and had nothing aboard for dinner. The new $4.5 million ferry was out of service again, so it was a long drive to a store. Fortunately, Manny and Mary, dockmates at Hidden Harbor came to my rescue. They were planning on making the drive and offered to pick up something for me. Well, they not only did the shopping, but they cooked it all and invited me for dinner!

Another dockmate, Gregg, had helped me do a more complete job of bleeding the hydraulic steering, so Monday morning I was ready to take Circadian out again to calibrate the compass (without magnetic headsets!) and see how the autopilot performed. At the dock, the helm definitely felt tighter, but the autopilot steering was quirky. While in general it still took more than twelve seconds lock to lock, a couple of times, after the system had been idle for a few minutes, it did it in about six seconds. But it would never repeat that. Very odd.
In any case, Ron once again offered to help me take the boat out and Barry, the harbor's resident limey, also wanted to come along. So off we went. We were out a couple of hours and things seemed to be going fine until just before we got back when the autopilot suddenly went dark. Back at the dock, my efforts to troubleshoot the problem were stymied. The depth sounder was on the same circuit as the autopilot and worked fine. The fuse in the autopilot's Heading Electronics Box was okay. I was also thrown for a curve when my trusty volt meter suddenly became untrustworthy. It would read fine one minute and then show no voltage in an active circuit. Well, at this point the frustration-to-time ratio had reached the terminal point. Besides, the dog's legs were now hurting so much he could hardly walk. It was definitely time to head home for some healing before heading back into the fray.


